
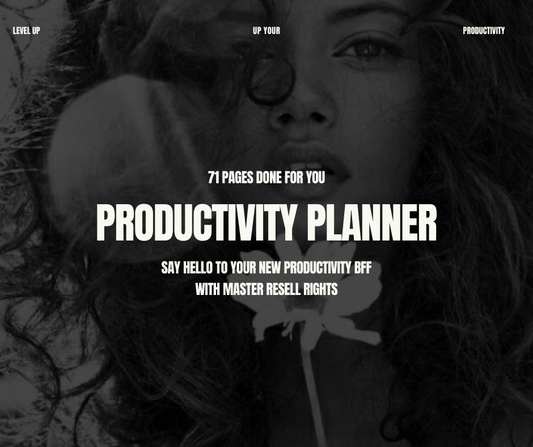
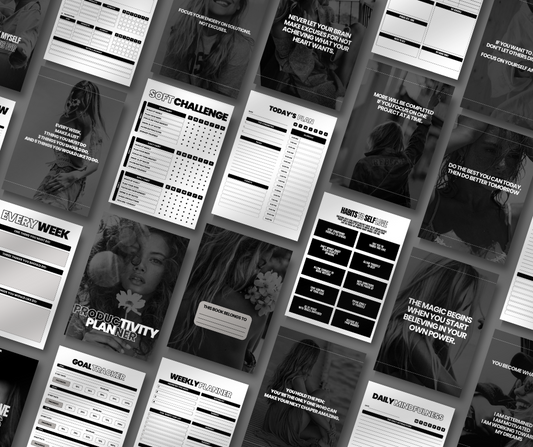

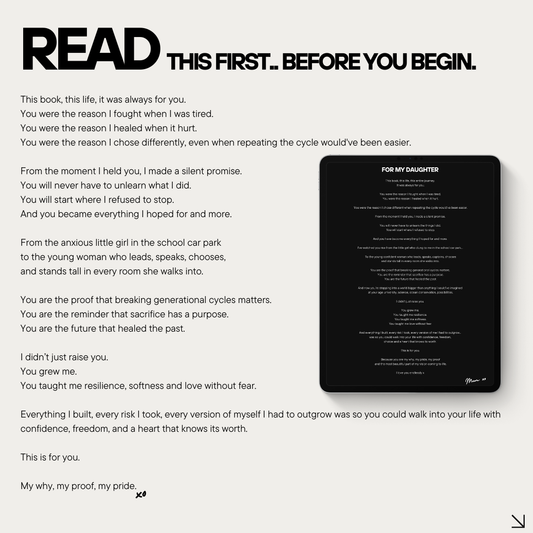
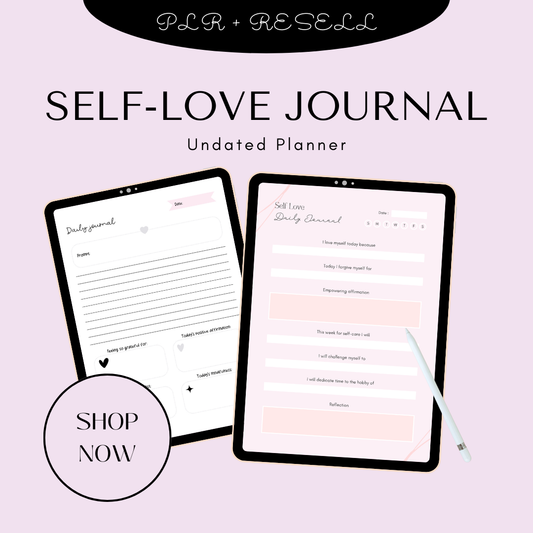

1. Introduction
Selling a physical product is easy to photograph — selling a digital product is not. Ebooks, Canva templates, printable planners, online courses, Lightroom presets, and other downloadable goods don't have a shape, texture, or size you can hold up to a camera. That's the core challenge every digital seller runs into sooner or later: how do you create digital product images for something that technically doesn't exist in physical form?
🎥 Prefer watching instead of reading?
Watch the full step-by-step explainer video below.
And yet buyers still need the same information they'd get from a physical product listing. They want to know what it looks like, what exactly they're getting, and how it's going to make their life or business easier. If you're wondering just how broad this category really is, this mega guide to 100+ digital products you can sell online in 2026 is a good place to see the sheer range of formats — from planners to prompt packs to templates — that all share this same imaging problem.
The solution isn't to fake a photograph. It's to build a set of visual representations — product mockups, page previews, lifestyle scenes, and feature graphics — that make an intangible file feel concrete, professional, and worth paying for. Get this right, and it becomes one of the most reliable tips for designing high-converting digital products you can apply across your entire shop, regardless of niche.
2. Why Digital Product Images Matter
Strong digital product images aren't decoration — they do real, measurable work on your listing. Specifically, they:
-
Make an invisible product easier to understand at a glance, before a buyer reads a word of your description
-
Show the product's design, format, and quality, the way packaging would for a physical item
-
Help customers imagine actually using the product in their own life, workflow, or business
-
Communicate exactly what's included in the download, reducing pre-purchase uncertainty
-
Reduce confusion about file types, page counts, dimensions, and platform compatibility
-
Make a listing look more professional and trustworthy, which directly affects conversion
-
Help a product stand out in crowded search results and social feeds, where thumbnails compete for a split-second of attention
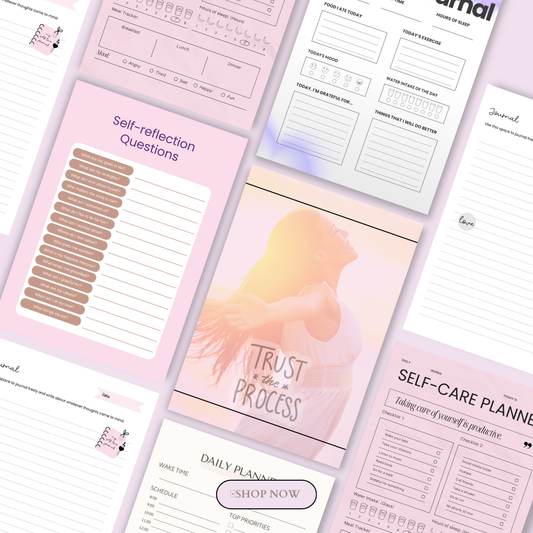
Here's a simple example: a listing titled "Budget Planner Printable" on its own tells a shopper almost nothing. But a listing for the same planner that shows the cover on a tablet, a few printed interior pages laid out on a desk, and a graphic explaining exactly what's included gives buyers a dramatically clearer — and more persuasive — picture of what they're paying for.
This isn't just intuition. Shopify's own guidance on product media notes that images, video, and 3D models help customers understand a product's function and quality, which builds the confidence needed to complete a purchase. Digital products don't need size demonstrations in the traditional sense, but the underlying principle holds: the more visual information you provide, the more confident your buyer feels clicking "buy." This is exactly why niches like the AI image collection, AI prompt packs, and bundles like the Glow Lab Co. skincare content templates lean so heavily on strong preview imagery — the product itself is invisible until the images make it real.
3. What Counts as a Digital Product Image?
Before you can build a high-converting image set, it helps to know the full toolkit available to you. A "digital product image" isn't one single format — it's a category that covers:
-
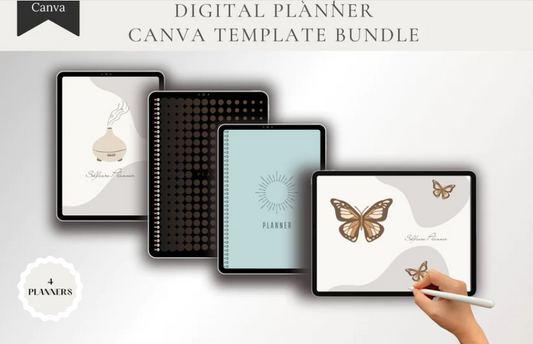
Product mockups — your file displayed inside a realistic device or scene
-
Screenshots and page previews — real, unedited views of the actual content
-
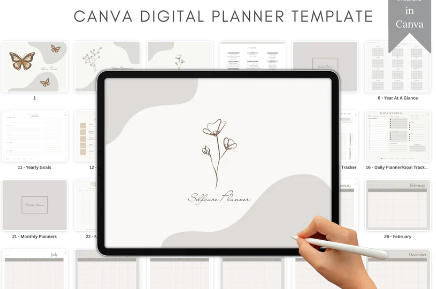
Interior-page collages — several pages or screens grouped into one image
-
Feature or benefit graphics — call-outs explaining what makes the product useful
-
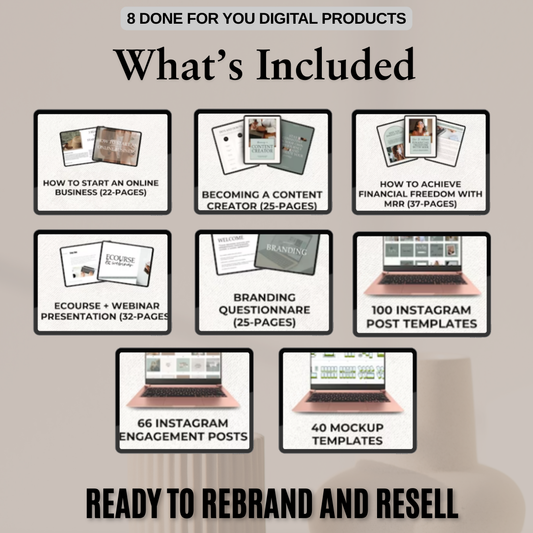
"What's included" images — a clear breakdown of everything in the download
-
Lifestyle or in-use images — the product shown in a real-world scenario
-
Device mockups — phone, tablet, laptop, or desktop framing
-
Size and format guides — dimensions, file types, and compatibility info
-
Before-and-after examples — the transformation the product enables
-
Tutorials or usage diagrams — visual instructions for getting started
-
Social media promotional graphics — images built for marketing, not just the listing itself
This range matters because digital products span wildly different categories — everything from a printable planner to a full digital downloads storefront selling templates, presets, and guides. If you're building out a shop and want a broader sense of what's sellable, this list of digital products to sell is a useful starting reference point.
The one-line takeaway: the highest-converting listings rarely rely on a single hero shot. They combine several of the formats above to answer different buyer questions at different points in the browsing journey.
4. Start With a Strong Hero Image
Your hero image is the first — and sometimes only — image a shopper sees before deciding whether to click. It appears in marketplace search grids, social posts, and landing pages, so it has to do a lot of work in a very small space.
A strong hero image should:
-
Show the product clearly, without unnecessary clutter
-
Be large and legible enough to read on a mobile screen
-
Use colors and typography consistent with your brand
-
Communicate the product category almost instantly
-
Leave enough negative space around the subject for platform cropping
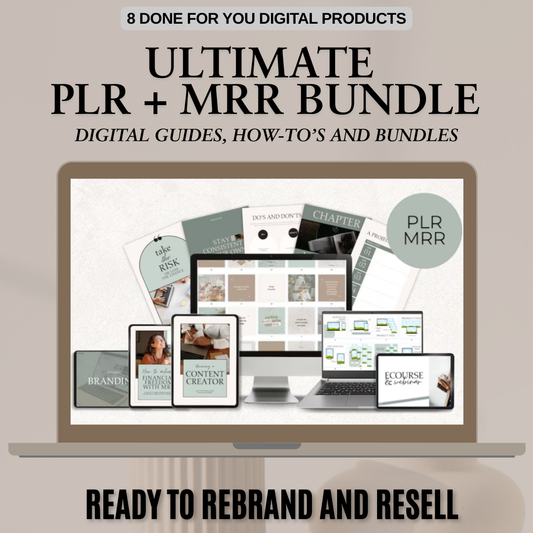
Mini example: for a social media template pack, an effective hero image might show a laptop displaying the full template collection, three or four individual template previews layered in the foreground, and a short label like "50 Instagram Templates" — all set against a clean, on-brand background. This kind of layout works especially well for products like the Content Girl Reels bundle or the Content Girl Collection image and reels bundle, where the value is in volume and variety, not a single static asset.
Common mistake: making the actual product too small, or burying it inside an overly decorative desk scene. A pretty flat-lay means nothing if the shopper can't immediately tell what they're buying. If someone building a side hustle is scrolling quickly through a marketplace, your hero image has roughly a second to earn a second look — don't waste it on props.
5. Use Product Mockups
A mockup places your digital file into a realistic physical or digital setting — a tablet screen, a printed book, a framed print — so an abstract file starts to look and feel like a tangible object. This works because the human brain trusts and understands things far more readily than it trusts files. A productivity planner shown inside a clean tablet mockup feels premium and usable. The same planner represented only as a folder icon does not.
Mockups work across nearly every digital category:
-
An ebook shown open on a tablet
-
A worksheet clipped to a clipboard
-
A website or presentation template displayed on a laptop screen
-
A self-love journal shown as a physical, bound-style book mockup — a format that works especially well for products like a self-love journal
-
Digital art or wall prints shown inside a framed room scene
Canva's own Mockups tool defines a mockup as a realistic rendering of a design within a setting that reflects how it might actually look or be used in real life, and supports formats spanning books, phones, websites, posters, apparel, and tech devices.
How to Create a Mockup
-
Export a clean, high-resolution preview of your finished product
-
Choose a mockup template that matches the product type
-
Insert your preview into the mockup frame
-
Adjust perspective, lighting, and shadow so it looks natural
-
Choose a background appropriate to your target audience
-
Confirm text and details remain fully readable
-
Export as a high-quality JPG or PNG
Choosing Realistic Mockups
Do:
-
Match the mockup style to your actual buyer (professional scenes for business tools, cozy scenes for planners/journals)
-
Keep angles natural and screens properly aligned
-
Ensure all text stays legible at thumbnail size
Don't:
-
Use mockups that imply physical delivery for a purely digital product
-
Overload the scene with distracting props
-
Choose an angle so extreme it distorts your design
If you want a full walkthrough of turning finished files into a sellable storefront — mockups included — this step-by-step guide to selling digital products online and the Midjourney Mastery Guide bundle are both useful resources — the latter especially if you're building mockups and visuals with AI image tools like Midjourney rather than stock mockup kits. For faceless creators building out bold, high-converting visual packs, the Glossed in Power viral content pack is a solid example of mockup-driven presentation done well.
6. Show the Actual Product
Mockups do a great job of creating context and appeal, but a mockup alone can't close the sale. Buyers eventually need to see the real thing — the actual pages, screens, or dashboard they'll receive when they download. This is especially true for content-heavy products like the ones covered in this guide to PLR digital products, where buyers are essentially trusting you on quality before they've opened a single file.
By product type, this usually means:
-
Planners — showing the cover, a monthly spread, a weekly layout, and a habit tracker
-
Ebooks — showing the table of contents, a couple of interior chapter pages, and any worksheets or illustrations
-
Spreadsheets — showing the dashboard, input fields, formulas in action, and summary charts
This is also where AI-generated visual products need extra care, since buyers can't "flip through" a prompt pack the way they can a PDF. Products like the Director's Cut cinematic AI animation prompt pack or the Motion Made Easy Midjourney motion prompts guide rely almost entirely on showing real output examples, since the "product" itself is instructions rather than a visual file.
Avoid Showing Too Much
Real previews build trust, but there's a limit. Showing every single page defeats the purpose of the purchase. To strike the right balance:
-
Show a selection of pages or screens, not the full set
-
Add a subtle watermark to detailed screenshots
-
Blur or cover any particularly high-value or proprietary sections
-
Display multiple pages at a reduced size rather than full resolution
The goal is to prove quality without giving the buyer a reason to skip the checkout button.

7. Create a "What's Included" Image
If there's one question every digital buyer asks silently before purchasing, it's "what exactly am I getting?" A dedicated "what's included" image answers this instantly, without forcing shoppers to read through a long description — which is exactly why it shows up consistently across guides on tips for designing high-converting digital products.
A strong "what's included" graphic should cover:
-
Page or file count
-
File formats (PDF, PNG, DOCX, etc.)
-
Available sizes (A4, US Letter, square, etc.)
-
Whether elements are editable or fixed
-
Any required software or apps
-
Bonus files or extras
-
Commercial-use or license terms
-
Delivery method (instant download, email link, etc.)
Example graphic for a digital planner might read:
Included in your purchase: 1 undated digital planner · 12 monthly sections · weekly and daily pages · habit and expense trackers · PDF with clickable navigation · designed for tablet note-taking apps · instant digital download.
This same approach applies to bundles from the Plan & Prosper collection and the Words That Sell collection, where buyers are often purchasing multiple file types in one package and need absolute clarity on what's inside before they check out.
8. Show Different Use Cases
Many digital products serve more than one purpose, and a lifestyle or context image helps buyers connect the product to their actual routine — not just its features on paper.
-
A content calendar template could be shown on a laptop next to a marketing plan, or in use during a social media scheduling session
-
A meal planner could be shown on a phone in a kitchen, or printed and stuck to a fridge with sample meals filled in
Canva's guidance on mockups reinforces this: consider your target audience, show realistic usage scenarios, include mobile-friendly framing since many buyers browse on their phones, and avoid backgrounds that clash with or distract from the product itself.
This principle scales well beyond planners, too — it's just as relevant for AI-built visual products. Sellers using tools covered in guides like 40 digital products you can create using ChatGPT or AI tools or exploring AI prompts to sell online should still show their output in a believable, in-context setting rather than an isolated file preview.
9. Use Device Mockups for Digital-First Products
Matching the right device to the right product type reinforces credibility and avoids confusing your buyer about how the product actually works.
-
Phone mockups — wallpapers, mobile apps, social templates
-
Tablet mockups — digital planners, journals, worksheets, ebooks
-
Laptop mockups — website templates, online courses, dashboards
-
Desktop-monitor mockups — software interfaces, presentations, digital workspaces
If a product genuinely works across multiple devices, show that. A multi-device example: a digital planner displayed on both a tablet and a smartphone, paired with a short caption like "Designed for tablet use; smartphone viewing supported." This kind of compatibility clarity matters just as much for done-for-you digital products, since buyers of ready-made bundles are often less technical and need extra reassurance about where and how the files will actually work.
10. Add Close-Up Images
Close-ups build confidence in quality and craftsmanship — something that matters enormously for visually driven products. They're especially effective for showcasing:
-
Typography and layout structure
-
Editable fields or dropdown menus
-
Charts, dashboards, and functional elements
-
Color palettes and overall image quality
This is where premium stock and AI image collections really earn their price tag. A close-up crop from Pastel Paris — 60 premium vintage luxury café vibes stock images or The Minimal CEO — 60 premium AI stock images can show off resolution, lighting, and detail in a way a small thumbnail never could. The same applies to volume-based packs like Content Girl Images — 100 premium aesthetic images, where a single close-up sample often does more convincing than showing the whole grid at once. Sellers building out this kind of visual catalog may also find the AI image collection and masterclasses on digital art commissions for beginners useful for leveling up both the product and its presentation. You can also browse the full masterclasses collection for deeper training on building and marketing visual digital products.
The rule to follow: every close-up should answer a specific, practical buyer question — never use one purely as a decorative crop with nothing to actually communicate.
11. Explain Size, Format, and Compatibility
One of the most common sources of confusion — and support messages — with digital products is buyers simply not knowing which devices, apps, or file types they need. A clear compatibility image solves this before it becomes a problem.
Useful information to include:
-
File types (PDF, PNG, DOCX, XLSX, etc.)
-
Dimensions (A4, US Letter, A5, square)
-
Color mode where relevant (RGB vs. CMYK)
-
Editable vs. flattened files
-
Required software or apps
-
Compatible devices
-
Whether printing is supported
-
Commercial-use rights
-
Whether files arrive as a ZIP
Example compatibility graphic:
Works with: Canva Free · Canva Pro · Desktop · Tablet · Mobile browser. You receive: 30 editable templates · PDF instruction guide · template access link · PNG preview files.
This matters just as much for prompt-based products as it does for templates — a buyer of the Prompt Stacking Secrets guide or the PLR Faceless Illustration Prompt Guide still needs to know exactly which tools and platforms the prompts are built for. One firm rule: never claim compatibility you haven't actually tested. A single inaccurate claim can generate refund requests that far outweigh the extra sale.
12. Design for Marketplace Requirements
Every platform crops, compresses, and displays images differently, so a design that looks perfect in your editor can end up cropped awkwardly once it's live.
Etsy's own image guidance recommends listing images with a width and height of at least 2000 pixels, with the first image at least 635 pixels to avoid ranking lower in search, and specifies that JPG, GIF, or PNG files are supported (though animated GIFs and transparent PNGs are not). Etsy also advises using a horizontal or square first image with enough negative space for cropping into different thumbnail shapes — guidance echoed in independent breakdowns of Etsy's product photography rules as well. Shopify's help documentation similarly confirms that stores can use images, video, and even 3D models as product media, provided the active theme supports those formats — and platform-specific breakdowns like this Shopify product images guide are worth checking before you finalize your export settings.
Practical Image Specifications
-
Create one high-resolution master file per image
-
Use a square or horizontal hero image for platforms that crop thumbnails
-
Keep the subject centered with breathing room around the edges
-
Export in sRGB color mode for accurate, consistent web colors
-
Compress for fast loading without blurring text
-
Preview every image at actual mobile size before publishing
13. Build a Complete Image Sequence
A well-structured listing answers buyer questions in a logical order rather than repeating the same shot. A reliable 10-image sequence:
-
Hero mockup
-
Product in use / lifestyle shot
-
Interior previews or screenshots
-
"What's included" graphic
-
Close-up detail shot
-
Size/format/compatibility graphic
-
Variations or available versions
-
Access or usage instructions
-
License/terms of use
-
Final lifestyle or benefit-focused image
Vary the content across these images rather than reusing one mockup with only minor edits — each image should earn its place by answering a different buyer question.
14. Use Text Carefully
Text overlays can sharpen a listing's clarity, but too much text turns a product image into an unreadable poster. Keep overlay text:
-
Short and specific
-
High-contrast and mobile-legible
-
Focused on one message per image
Good example phrases:
-
"40 Editable Canva Templates"
-
"Includes A4 and US Letter Sizes"
-
"Instant PDF Download"
-
"Works With Canva Free"
Avoid: long paragraphs, tiny fine-print disclaimers, or dense technical specs crammed into the image — save that detail for your product description.
15. Maintain Visual Consistency
A professional image set should look like it belongs to one product, one brand. Keep consistent:
-
Color palette
-
Font choices
-
Mockup style
-
Lighting and shadow treatment
-
Spacing and alignment
-
Overall tone
For example, a planner shop might lean into warm neutral backgrounds and soft serif headings, while a business template shop might use crisp white backgrounds and structured grid layouts. This same consistency is what makes niche bundles like Salt & Sage Instagram post templates and 100 Skincare & Beauty Instagram posts feel cohesive and premium at a glance — every preview image shares the same neutral palette and styling.
16. Protect Your Digital Product
Because digital files can be copied, sellers need to balance transparency with protection. Reasonable safeguards include:
-
Low-resolution previews where appropriate
-
Light watermarks on detailed screenshots
-
Partial reveals rather than showing the complete product
It's just as important to confirm every mockup, font, and stock image you use is properly licensed for commercial resale — Canva's own terms state that exported mockup images can be used commercially, but the mockups themselves can't be resold or redistributed as new mockup assets. This licensing awareness matters especially for sellers building visual packs like Health & Wellness AI imagery or the Influencer Energy prompt pack, where the images themselves are the product being resold.
17. Common Mistakes to Avoid
-
Showing only the cover, with no interior content
-
Making the product too small within the image
-
Using mockups that imply physical delivery for a digital-only product
-
Hiding important limitations (non-editable, requires paid software, etc.)
-
Overloading images with text
-
Using inconsistent image sizes across a listing
-
Uploading low-resolution or blurry screenshots
-
Relying on generic stock photos instead of real previews
-
Ignoring how the image looks on mobile
18. A Simple Workflow for Creating Digital Product Images
-
Identify your buyer and the product's primary use
-
List the questions a buyer is likely to ask before purchasing
-
Select the image types needed to answer those questions
-
Export clean previews or screenshots from the finished product
-
Build your hero mockup
-
Add lifestyle and device mockups where relevant
-
Design a "what's included" graphic
-
Create close-ups of standout features
-
Add format, size, and compatibility information
-
Confirm licensing on every mockup, font, and stock asset
-
Export in platform-approved formats
-
Test cropping and readability on mobile
-
Upload in a logical sequence
-
Review the listing as if you were a first-time buyer
If you're also thinking beyond the images themselves, pairing strong visuals with a solid promotional plan — covered in 10 strategies for marketing digital products that actually work — and a smooth fulfillment process, as outlined in this guide to automating digital product delivery, rounds out the full buying experience. Sellers in visual niches, including digital products for photographers, rely on this exact workflow to turn preset packs and templates into consistently high-converting listings.
19. Digital Product Image Checklist
Before you publish, confirm your images:
-
✅ Show the actual product clearly
-
✅ Include at least one realistic mockup
-
✅ Include interior previews or screenshots
-
✅ Explain exactly what the buyer receives
-
✅ Communicate file format and compatibility
-
✅ Show the product in a relevant use case
-
✅ Are readable on mobile devices
-
✅ Use consistent branding throughout
-
✅ Avoid misleading physical-product implications
-
✅ Follow the marketplace's image requirements
-
✅ Use properly licensed assets
-
✅ Are exported at sufficient resolution
-
✅ Leave enough space for thumbnail cropping
-
✅ Don't reveal the entire paid product unnecessarily
20. Final Takeaway
The goal of digital product images was never to fake a physical object — it's to make something intangible understandable, tangible, and easy to imagine using. The strongest image sets combine a clear hero shot, realistic mockups, genuine previews, and practical details like format and compatibility, all working together.
Every effective set answers three questions visually: What is the product? What will I receive? How will I use it?
Answer those clearly, and your images stop being an afterthought — they become one of the most reliable drivers of conversion your listing has.
Frequently Asked Questions
1. Do I need professional photography equipment to create digital product images?
No. Since digital products aren't physical objects, you don't need a camera, lighting kit, or studio setup at all. Most sellers create high-quality digital product images using free or paid mockup generators, Canva templates, and clean screenshots of the actual product. What matters far more than equipment is realistic mockups, accurate previews, and consistent branding across your listing.
2. How many images should a digital product listing have?
Most high-converting listings use somewhere between 6 and 10 images, covering a hero shot, in-use/lifestyle image, interior previews, a "what's included" graphic, a close-up, and a size/format/compatibility image. The exact number depends on your platform's limits, but the goal is always to answer a different buyer question with each image rather than repeating the same mockup with small variations.
3. What image size and format should I use for Etsy or Shopify listings?
Requirements vary slightly by platform, but a safe standard is exporting images at a minimum of 2000 x 2000 pixels in JPG or PNG format, using the sRGB color profile for accurate web colors. Always check your specific platform's current image guidelines before finalizing your files, since cropping behavior and accepted formats can differ between marketplaces.
4. Are mockups misleading if the product is 100% digital?
Not if they're used correctly. A mockup simply represents the product in context — for example, showing an ebook on a tablet or a template on a laptop screen — it doesn't imply the buyer will receive a physical item. The key is to keep your product description and any "what's included" graphic clear about the digital-only format, so there's no confusion about what's actually being delivered.
5. How do I protect my digital product images from being copied or stolen?
Common protective measures include adding light watermarks to detailed preview screenshots, showing only a selection of pages rather than the entire product, and using reduced resolution on close-up previews. It's also important to make sure every mockup, font, and stock image used in your product photos is properly licensed for commercial use, so your protective steps don't accidentally create a licensing issue of their own.
🎬 Want a visual walkthrough?
If you’d rather watch than read, here’s the full explainer video covering everything in this guide: